To install Social Stream Designer plugin in your WordPress website please follow below instructions.
Installation Via WordPress admin
-
- Download plugin copy from your codecanyon member account.
-
- Extract that codecanyon downloaded zip in your local PC. There are 3 items inside it.
- social-stream-designer-document.zip
- social-stream-designer.zip
- Licensing
- Extract that codecanyon downloaded zip in your local PC. There are 3 items inside it.
-
- Login into your WordPress admin area and click on the left side plugin menu.
-
- Now at top of the page, you can see Add New button, click on that button.
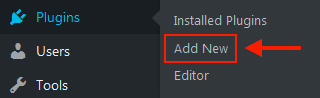
- Now at top of the page, you can see Add New button, click on that button.
-
- Again at top of the page, you can see/view the Upload Plugin button, click on that button for the next process.
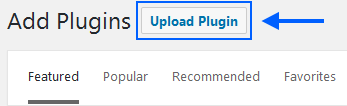
- Again at top of the page, you can see/view the Upload Plugin button, click on that button for the next process.
-
- Now upload the plugin zip file (social-stream-designer.zip) via drag and drop or direct file upload selection. After file selection and click on Install Now button.
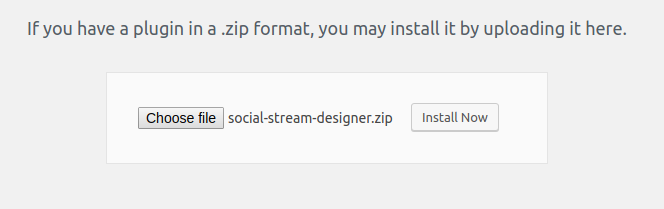
- Now upload the plugin zip file (social-stream-designer.zip) via drag and drop or direct file upload selection. After file selection and click on Install Now button.
-
- And then click on Activate Plugin link.
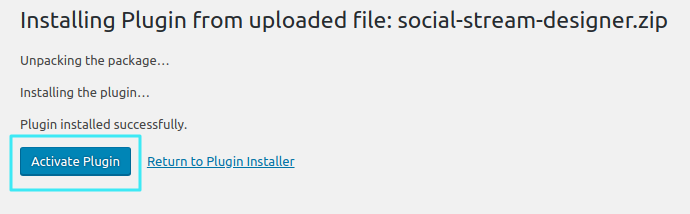
- And then click on Activate Plugin link.
Installation via FTP
-
- Extract the above-selected zip file (social-stream-designer.zip). It will create a ‘social-stream-designer’ folder with all plugin files & folder inside it. (Remember this extracted folder path)
-
- Using your FTP programs like Filezilla or cPanel, upload the non-zipped plugin folder into the /wp-content/plugins/ folder on your server.
-
- Go to Dashboard » Plugins » Installed Plugins page and find ‘Social Stream Designer‘ from the plugin list.
-
- Click on Activate to activate the Social Stream Designer plugin.
Still, you did not get the solution for your query? Open a support ticket.